How to Replace or Remove an Image Background Using the Magic Wand Tool
- PCR Graphics Firm
- 1
- on Aug 04, 2022
How to Replace or Remove an Image Background Using the Magic Wand Tool – Sometimes, an unsuitable background doesn’t allow us to use the picture for our specific purpose. For example, you want to upload an image to a website but the website doesn’t allow the type of background existing with your image. What to do in that case? Don’t worry; we have the solution for you.
Removing or replacing the background can be the perfect solution. Using Photoshop you can do the operation. Are you new to Photoshop and looking for a convenient way to replace or remove backgrounds in Photoshop? You have come to the right place.
Through this article, you are going to learn how to replace or remove an Image Background using the Magic wand tool in Photoshop. The process is so easy that a beginner can also do it.
Can’t wait anymore for the step-by-step tutorial? Let’s jump onto it.
How to Replace or Remove an Image Background Using the Magic Wand Tool
Step 1: Select Magic Wand Tool
At the very first, you have to load your image in Photoshop and select the magic wand tool. Let me show you where you can find the magic wand tool in Photoshop.
Step 2: Select the object
To replace or remove the image background, we have to select the object with the magic wand tool. Zoom in the picture by pressing “CTRL and +” together. Then, you need to click the left mouse on the object. With a single click, you might not get the desired result. From the top, change the selection option to ‘Add to selection”.
Try different values of tolerance for making a selection properly. Click multiple times within your object to get rid of unwanted selection lines.
Is there any selection outside of the object? Have a look at this screenshot.
Screenshot 3
You might also face the same issue. We need to erase those selections from the background area. Press and hold the ALT key, then click on those selections. It will remove those selections from the background.
You need to keep your object in this form.
Screenshot 4
The selection will be on the objects only. Now, we have to reverse the selection to the background. How to do that? You will learn it in the next step.
Step 3: Reverse the selection to Background
As we are going to remove the background, we have to reverse The selection to the background. To do that, you have to press “CTRL + SHIFT + I”.
Screenshot 5
Now, the background is selected and we can erase the background.
Step 4: Bring Transparent Background
In this step, you have to press the “Delete” key. it will remove the currently selected background and bring a transparent background. Here you can see the result.
Screenshot 6
We got the cake in a transparent background. Now, using the arrow option showing in the picture you can change the position of the object. You can place the object in the center for a better view or anywhere else according to your requirements.
If you want to keep the background in this form, you have to save the file in PNG format. Do you want to replace the background? Okay, let’s do it.
Step 5: Replace the Background
To replace the background with an existing background in your device, drag the file into Photoshop.
The second picture will be loaded as a new layer. you have to drag the layer down and bring the object’s layers to the top. Just like this one.
Screenshot 7
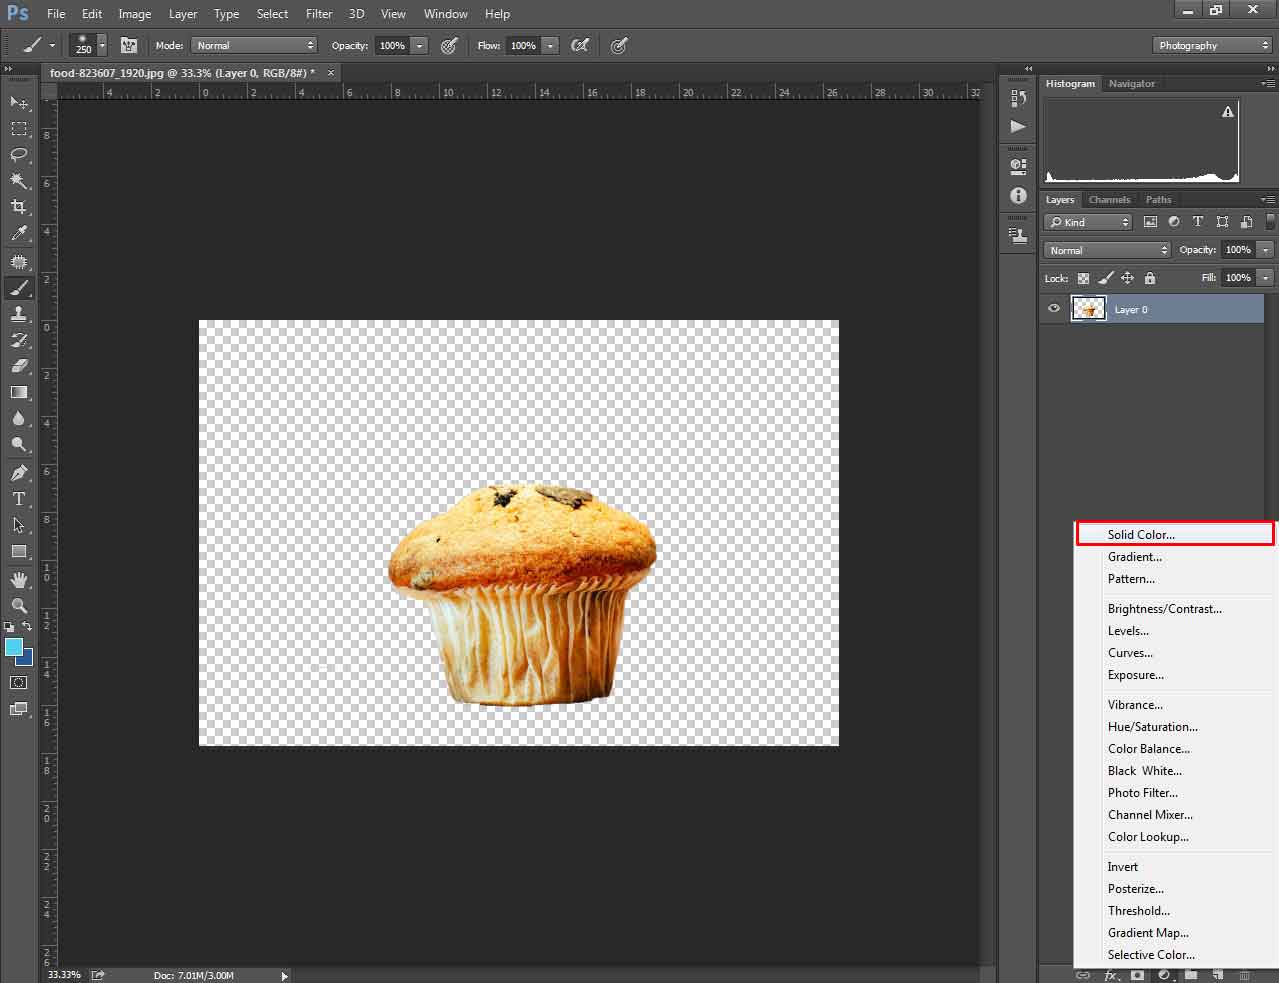
Want to replace the transparent background with a solid color background? Then, you have to go to the adjustment layer option in spite of loading a new picture.
Screenshot 8
Choose the solid color option from that list and it will bring color presets. Pick the color of the background and hit on “Enter”.
After that, you will notice a new layer filled with your selected color. Click on that layer and drag it down.
Screenshot 9
The result is pretty decent, isn’t it?
Following the above procedures, you will be able to replace or remove an image background using the magic wand tool. As you do not have to make the selection manually, it would not take too much time. Let me inform you that you can’t remove the background precisely from any image using this technique. Clipping path will be needed for that.
Why do we need to remove or replace a background?
Almost all of us have some photos that we cannot use for the unsuitable background. Alongside, you might want to grab the attention of the viewers towards a specific subject. An unsuitable background can prevent you from achieving your goal. Using background removal techniques, we can get rid of any unsuitable backgrounds.
Background removal can help online sellers by driving the attention of the viewers towards their products.
Get Background Removal Service
Don’t you get enough time to edit your photos? Professional Background Removal Service is available for you. Your photos will be edited by professional graphic designers. How to get the service? You can contact ABC (Website Name) now to place an order. They are available 24/7.
Who can be beneficial through Background Removal Services?
- Photographers
- Online Shop Owners
- F-commerce Owners
- Amazon, eBay, Alibaba sellers
- Advertisers
Final Thoughts
You have learned How to Replace or Remove an Image Background Using the Magic Wand Tool. When you have simple and basic objects in your photo, this is an easy technique to apply.
Share your thoughts about the article in the comment box. Stay with us to get more useful updates like this one. Wish you all the best.
FAQ
- What is the best file format for a transparent background?
- PNG format is the best option for transparent background.
- Can I use the Magic Wand Tool for selecting a complex object’s background removal?
- Expert designers don’t recommend selecting complex objects with the Magic Wand Tool.
- What is the magic wand tool?
- Magic wand tool is an automatic selection tool available in Photoshop.
How to Replace or Remove an Image Background Using the Magic Wand Tool
Published By
PCR Graphics Firm
One thought on “How to Replace or Remove an Image Background Using the Magic Wand Tool”